Myths and Legends of Mt. Shasta

Myths and Legends of Mt. Shasta

At 14,180 feet, Mount Shasta is an impressive volcano and mountain. It is the second tallest mountain in the Cascade Range; and it is the fifth tallest mountain in all of California. Every year, tens of thousands of people come to hike, camp, backpack, ski, snowshoe, and otherwise experience everything the mountain has to offer. But the mountain isn't all about leg crunching pain, boiling water and wilderness experiences. Unlike the other mountains in the Cascade Range, Mount Shasta is a mystical location that may or may not have a myriad of strange creatures; and may or may not have a hollow core. One thing is for certain, however: Mount Shasta is the premier mountain in the United States to possibly experience the most weird things at; including, but not limited to the top six items here. 

Status of the Whitney Glacier

Status of the Whitney Glacier

As a general rule, I try to avoid discussion of political topics on my blog. It's not because I'm apolitical - far from it - but because I know that you can find political commentary anywhere else; and this is why I usually try to confine my discussion of topics to what I see and experience, along with making the occasional obscure literary, musical, or sci-fi references that pop into my brain. But, when I was on Shasta this year, I did notice something that caught my attention – a large-ish pool of water atop the Whitney Glacier. For my readers who are not avid mountaineering buffs, the Whitney Glacier is one of the permanent glaciers on Mt. Shasta, and is the only valley glacier in all of California.

Climbing Mt. Shasta: Avalanche Gulch Route & Directions

Climbing Mt. Shasta: Avalanche Gulch Route & Directions

So, you want to climb Mount Shasta? Be warned, like anything else in life, it is a task fraught with perils, challenges, and heartbreak. But, like anything else in life, should you have the mental fortitude to address each of these tribulations, you will be rewarded with an enormous sense of accomplishment and the glory of a fine view. Whether Mount Shasta is the first major mountain you are attempting to summit, or the thousandth peak you have bagged, in my opinion, your best chance of reaching the summit is the tried-and-true Avalanche Gulch route. Full disclosure: the Avalanche Gulch route is the most popular route on the mountain, bar none. But let’s pause for a second here: there’s popular routes like the Mt. Whitney Trail, which have a packed lottery system and actual hordes of people on the trail; and there’s popular routes, which just mean that it’s the best and quickest route to the summit.

Current Conditions, Avalanche Gulch Route, Mt. Shasta, August 2012

Current Conditions, Avalanche Gulch Route, Mt. Shasta, August 2012

I always wonder what to include in these write-ups of trails, climbs, and strange spots. I wonder if I should get into the history of the area, my background, experience, side-stories, or if I should always just be brief and stick to the facts, just the facts, Dragnet style. When the place or area is large, like say, Mount Shasta, I find these decisions even harder. In this case, I’m going to go with the actual relevant information first for climbers, and cover the current conditions on the mountain first. This information is from my Tweetup climb from August 9, 2012 through August 11, 2012 with a couple Twitter members and non-Twitter climber Erik. This was a great group of climbers, and I’d be honored to climb with any of them again. We took the standard Avalanche Gulch route up the mountain, and we managed to get three out of the five of us on the summit, and had no serious problems during the climb in any way, so all in all, it was a successful, safe, and great experience. If you don’t know where or what the Avalanche Gulch route is, don’t worry – I’ll get into particulars of distances and locations on Monday, when I discuss the route in general terms; and if you do know the route, I’ve thrown in conditions as I experienced them at specific spots along the way last week.

Volcan Mountain

Volcan Mountain

In 1995, a Democrat was President; cell phones were chunky bricks that seemed better suited to calling in air strikes; you connected to the Internet via this thing called a modem that was connected to this other thing called a land line; and cassette tapes/VHS tapes were battling it out in a format war with these things called CD’s and DVD’s. Even crazier, Val Kilmer was Batman. That’s right. Val Kilmer. Batman.  If that doesn’t prove that the 1990s was a strange time, I don’t know what does. Back then, I was just starting out as an outdoor adventurer. There was no handheld GPS; we had handheld maps, and handheld compasses – and woe betide you if you placed your compass on a car hood to take bearings! We also didn’t have hiking forums, blogs, or websites – we had these things called books. At that time, the best book for San Diego County was Afoot and Afield in San Diego County by Jerry Schad, who was the preeminent wilderness expert for the region.

Climbers Loop Trail, Mission Trails Regional Park

While San Diego County has a plethora of great hiking trails, it does not have a lot of great climbing routes. Sure, there’s some decent routes out in the desert, but realistically, no one wants to be out in the Anza Borrego desert in the dead of summer. In no particular order, some of the better places to climb in the county are on the boulders at Woodson Mountain; the summit slabs at Stonewall Peak; the final approach on Mt. Lawson; and the routes at Mission Trails Regional Park.

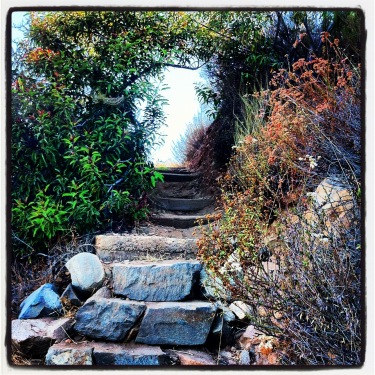
Steps, Climbers Loop Trail

While none of these routes are going to confuse anyone with say, Half Dome, El Capitan, or any other big wall on the planet, they’re great areas for learning and practicing your climbing skills that aren’t in a controlled environment (otherwise known as climbing gyms). All of these areas have great hikes leading to the climbing areas, but this hike is the shortest and steepest of the bunch.

Directions: The best way to access this trail is to park at the Mission Trails Regional Park Visitor Center, which is located in the main portion of the park off of Mission Gorge Road. Even though Cowles Mountain is not located in this part of the park, parking remains at a premium on the weekends by the Visitor Center, due to the popularity of the area, and its proximity to a number of trailheads. While there is some parking along Father Junipero Serra Trail, the road that runs through Mission Trails, these spots are usually taken as well by mid-day.

From the Visitor Center parking area, you will want to head down Father Junipero Serra for .40 miles. During this short distance, I would suggest that you take the opportunity to enjoy the paved, flat surface and stretch out any kinks you have in your legs, as the actual trail has few flat sections, and is most definitely not paved! At .40 miles, you will see the trailhead on the right (south) side of the road, along with a kiosk detailing the steep terrain on the trail, and various climbing routes present on the Western face of Kwaay Paay Peak. From this point, the trail ascends steeply for .34 miles. How steep is it? Well, it ascends 406 feet over that distance, so while it isn’t the steepest terrain imaginable, it’s not a walk in the park either. Once you have ascended the 406 feet, you will have great views of Mission Trails, Mission Gorge, and the climbing routes.

Climbing Routes, west Kwaay Paay Peak

Based on my experience, if you are climbing any of the routes on the western face – Middle Earth, Limbo, or the main wall, you will definitely be warmed up and ready to go by the time you reach the “top”.  If you’re not climbing, continue on along the mostly flat section of trail leading past the climbing areas, before descending down another steep section of trail. If you are solely hiking this area, the total distance for this hike is 2.2 miles roundtrip (.4 from the parking area to the trailhead, 1.2 miles on the actual trail, and .6 from the far trailhead back to the parking area).

Tips: I personally like to run this trail on weekdays. The steep terrain is very challenging, and gives you a great workout. Unlike Cowles Mountain, it is also not as busyduring the week. Do note, however, that the trail is very steep, and what I would consider “single track” in many areas. Keep an eye out for other hikers, as well as climbers carrying gear so you do not potentially run into them. Aside from that, the routes on the western face of Kwaay Paay Peak are not that technical, so they are a great area to learn how to climb if you do not; and many companies provide lessons on a weekly basis at this location. Even if you do not wish to climb, this is a hike with some great views of the surrounding terrain, and if you’re curious about climbing, good views of climbers doing what they do: climbing.

Del Dios Gorge Trail

Artichoke Thistle, near the start of the trail - beautiful, but invasive!

It’s time for some not-so-shocking true confessions today: I’m that person who stops when he thinks that he seems something interesting. I’m the person who, when he sees something interesting goes, “Hey, that looks really neat/interesting/what-is-that/different, I should check that out!” Then, I safely determine how to check it out, or, if there’s time or other constraints, mentally file the location and mysterious (or not so mysterious) thing away for a future visit. Sometimes, these places are as awesome as I think they are. Then again, sometimes, there’s a colossal letdown when I visit these spots.

Fortunately, one of San Diego’s “newer” trails is on the more awesome side of life. For years, I’ve been driving along Del Dios Highway and through the Del Dios Gorge, and have always wondered what exactly was down there. In the brief stretches where the road was not curvy, I’d peer into the gorge, and consider whether I could bushwhack through the terrain to Lake Hodges Dam. I never did this because I knew it would be hard on the environment); hard on my body (if you’ve ever traveled cross country through heavy brush, you know what I’m talking about; and because I never had the time. In 2006, the San Dieguito River Park unintentionally read my mind, and began construction of this trail in the exactarea where I had always wanted to go as part of the “coast-to-crest” path; and in 2010 the trail opened to public use. I’m not sure what was holding me back from visiting this area the last two years, but based on my hike the other day; I’ll definitely be going back in the near future.

Del Dios Gorge Bridge

Directions:  The trailhead is located in the Del Dios Gorge parking area, which is located directly off of Del Dios Highway. If you are traveling east on Del Dios Highway, you will pass Calle Ambiente on the left, and then there will be a fruit stand that is present that will be on your immediate right. At the location of the fruit stand, there is a road that is marked with “SDRP” signs that leads to the parking area. Similarly, if you’re heading west on Del Dios, you’re going to want to find a way to turn into the fruit stand and follow the access road. Do note that this access road is closed at night, so if your car is in the lot past sunset, you may be locked in the parking area. The map from the SDRP, presented as the first link below does a great job of showing where you will turn.

From the parking area, follow the remainder of the access road to the top of a slight rise to the south, where the road dead-ends next to the Crosby Estates. This is where the Del Dios Gorge Trail starts (to the east); and where the Santa Fe Trail starts (to the west). The trail from this point is well marked, and for the first quarter to half mile, heads slightly uphill along the boundary of the Crosby Estates. While it is a bit disappointing to be directly next to civilization during this section of trail, there are great views of the mysterious Del Dios Gorge below. Depending on what season it is, you will also be able to view larger stretches of flowing water. When I went two weeks ago, there was not much water flowing, but 2012 has been a dry year, and it is summertime – but it was still cool to see what was heading through the gorge.

Lake Hodges Dam

After the initial section along, the trail traverses along the gorge, before dropping down past some interesting interpretive panels about bats, and then down into the gorge proper, where it crosses a fancy bridge that was installed specifically for the trail. This is a great spot to peer into the river, and check out the riparian terrain all surrounding you at this point. From the bridge on, however, was my favorite stretch of trail, as you are in the Del Dios Gorge proper, under partial tree cover, and next to the river. While you are technically beneath/next to Del Dios Highway at this point, I found the trail to be fairly quiet from ambient vehicle noise. At this point, the trail also begins to ascend along the side of the gorge to provide you with a great viewpoint to view the Lake Hodges Dam. At around the 1.75 mile mark, one way, there is another great interpretive panel display about wildfires, and the Dam itself. From that point, it is another slight uphill grade to have a great view of the Dam proper at the two mile point. At this point, you can elect to turn back to your car for a moderate four mile hike, or you can continue along the well-marked trail along the North Shore of Lake Hodges for an extended distance.

Tips: At 1.5 miles from the parking lot, there is a dirt access road turnoff for Lake Hodges Dam. It is impossible to miss, as it is well-marked with a plethora of “Keep-Out” signs. Although I personally would never venture into an area marked “Keep-Out”, I would suspect that if you follow it, you would have a great view of the lower area of the Lake Hodges Dam. I’m only telling you, the reader this, so you do not get lost and venture down to the Dam and receive a ticket, or get arrested, so you may consider that tip for informational use only. As for the rest, this is a great spot to jump off for a longer hike; and although I haven’t been here during the spring, I’d suspect that springtime is the best time for this trail due to wildflowers, and higher water flow in the river, and potentially over the Dam.